
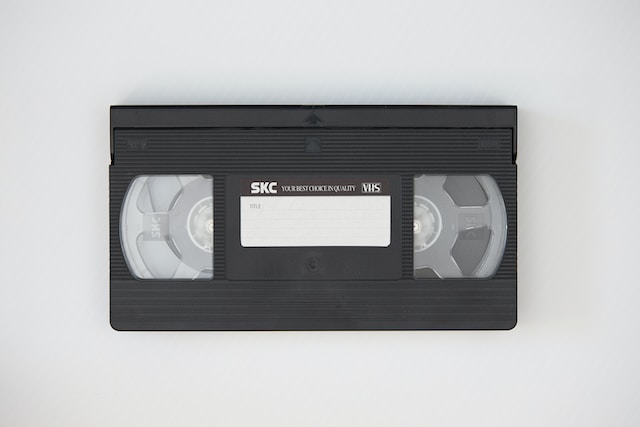
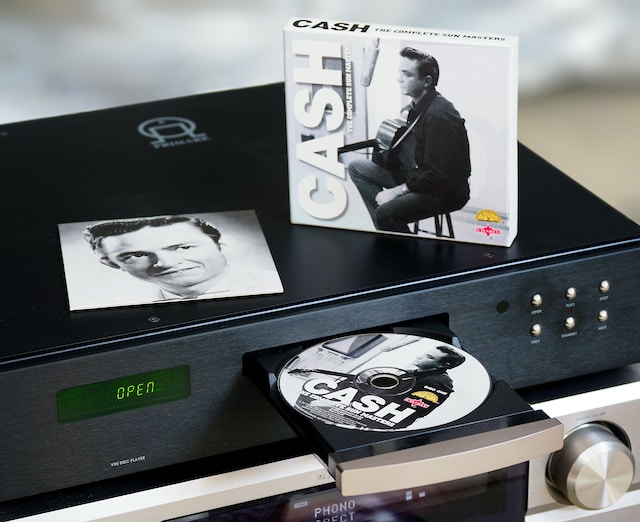
Are you a nostalgic soul with a stack of VHS tapes filled with cherished memories? Do you worry that those precious moments might fade away as VCRs become relics of the past? Fear not! In this comprehensive guide, we’ll walk you through seven foolproof methods to convert your VHS tapes into digital format, ensuring your memories are preserved for generations to come. Say goodbye to the grainy, fragile tapes and say hello to digital clarity and convenience. Let’s dive in!
Why Convert VHS to Digital?
Alrighty then, folks, let’s first tackle the big ol’ “why” question. You see, back in the day, VHS tapes were the bee’s knees for capturing all those heartwarming family shindigs, birthday blowouts, and other unforgettable moments. But here’s the kicker – those suckers have a built-in time bomb, a real drama queen of degradation. Over the years, they start losing their mojo, both in the sound and picture departments. And don’t get me started on the quest to find a working VCR nowadays; it’s like hunting for a unicorn in a haystack! But fear not, my fine friends, by converting those ancient relics into digital gems, you’re not only saving your precious memories but also opening up a world of sharing, editing, and storage possibilities. It’s a double-decker, slam-dunk, slammin’ good time – a win-win like winning the lottery with a bonus puppy!
Method 1: DIY with a VHS-to-Digital Converter
To embark on your DIY journey, the first thing you’ll need is a reliable VHS-to-Digital Converter. There are several options available on the market, each with its own set of features and price points. Some popular choices include the Elgato Video Capture, Roxio Easy VHS to DVD, and the Diamond VC500. These devices act as intermediaries between your VCR and your computer, facilitating the conversion process.
Once you’ve obtained your converter, it’s time to connect your VCR and computer. This typically involves using USB cables, so make sure you have the necessary ports available. Follow the manufacturer’s instructions carefully, as different converters may have slightly different setup processes.
The Conversion Process
Now, here comes the exciting part! With your VCR and computer connected, you can start the conversion process. But before you hit that record button, there are a few things to keep in mind for the best results:
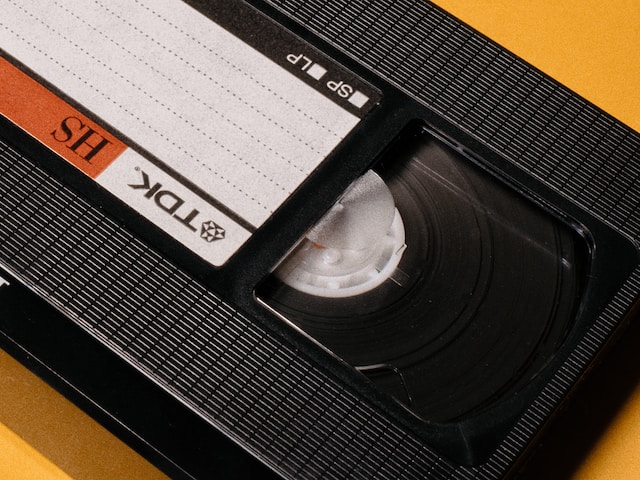
- Dust off Those Ancient Relics: Ah, the good old VHS tapes! Before you embark on your epic quest to transform them into digital wonders, let’s make sure they’re not harboring a secret civilization of dust bunnies, moldy surprises, or the battle scars of countless movie marathons. Give them a gentle spa day and, if your VHS player looks like it’s been on a dusty desert adventure itself, treat it to a head-cleaning tape so it can strut its stuff in style.
- VCR Spa Day: Now, for the star of the show – your trusty VCR! Make sure it’s not feeling neglected and cranky. Check if it’s in tip-top shape and set it to “Cinematic Excellence” mode – or as close as it can get to that. After all, we wouldn’t want your VHS-to-digital transformation to turn into a quirky vintage comedy with blurry actors, right?
- Software Setup: Install the software that comes with your converter onto your computer. This software will allow you to capture and edit the video as needed.
- Capture and Edit: Launch the software, play your VHS tape, and start capturing. You can pause and edit the footage if you want to remove any unwanted sections or enhance the overall quality. This step gives you creative control over the final digital version.
Saving Your Memories
Once you’ve tangoed with your VHS relic, dolled it up like it’s auditioning for a blockbuster, it’s time to engage in a thrilling game of “hide and seek” with your newfound digital gem. You get to decide whether it spends its downtime chilling in your computer’s secret vault, embarks on a USB adventure, or gets the red carpet treatment by chauffeuring it over to an external hard drive. And, of course, don’t overlook the opportunity to style it in the perfect disguise; you’ve got options aplenty, whether it wants to go incognito as an MP4, sporty as an AVI, or classy as an MOV!
Now that your digital file is safely tucked away, you’re officially the guardian of a time-traveling relic! You’ve not only preserved a piece of your personal history but also turned it into a digital sensation. Prepare for an avalanche of likes and shares as you introduce your vintage treasures to the modern world!
If you find yourself drowning in a sea of ancient VHS tapes, brace yourself for a journey that’s as time-consuming as trying to untangle a slinky. Converting these relics to digital might make you feel like you’re attempting to teach a sloth how to sprint, but fear not! The pot of gold at the end of this rainbow of nostalgia is worth its weight in gigabytes.
Whether you’re on a quest to relive the glory days of your childhood or want to immortalize those cringe-worthy family gatherings for generations to come, the DIY route with a VHS-to-Digital Converter is your ticket to adventure. It’s like being the Spielberg of your own home videos, where you can wield your creative magic wand to transform your memories into digital masterpieces. So, get ready to embark on a quest for the holy grail of nostalgia, armed with your trusty VHS converter and a sense of humor!
Method 2: Professional VHS-to-Digital Conversion Services
Have you ever considered outsourcing a task to experts when you want it done perfectly? Well, that’s precisely what you’re doing when you opt for professional VHS-to-Digital Conversion Services. It’s like taking your vintage car to a skilled mechanic who knows every nut and bolt. Here, we’ll explore this method in detail, so you can appreciate the benefits and understand why it might be the ideal choice for your VHS conversion needs.
Step 1: Research and Choose a Reputable Service
Before you embark on your journey to digitize your precious memories, the first step is to find the right conversion service. This step is crucial because the quality of your digitized tapes heavily depends on the expertise of the service provider. Here’s what to consider during your search:
Reputation: Look for reviews and recommendations. Ask friends or family if they’ve had positive experiences with any particular service. A reputable service will have a track record of delivering high-quality conversions.
Quality Guarantee: Ensure that the service provider offers a guarantee for their work. This is a sign of confidence in the quality of their digitization process.
Sample Work: Some services may provide samples of their digitized tapes on their website or upon request. Examining these samples can give you a preview of the quality you can expect.
Pricing: Compare prices among different services, but remember that quality should be the primary consideration. Saving a few bucks won’t matter if your cherished memories are compromised.
Step 2: Prepare Your VHS Tapes
Once you’ve chosen a reputable service, it’s time to prepare your VHS tapes for digitization. This step may seem straightforward, but proper preparation can make a significant difference in the outcome:
Organization: Organize your VHS tapes and label them if necessary. If you have specific instructions for any tapes, make them clear. The better you communicate your needs, the more likely you are to receive a tailored service.
Cleaning: While professional services will clean your tapes as part of the digitization process, it’s a good idea to clean them as well before sending them out. Dust and dirt can affect the quality of the conversion.
Inventory: Create an inventory of the tapes you’re sending. This list will help you keep track of your collection and ensure that nothing gets lost during the conversion process.
Step 3: Send Your Tapes to the Conversion Service
With your tapes prepared and organized, it’s time to entrust them to the professionals. Most conversion services offer straightforward shipping instructions. You’ll typically need to package your tapes securely, include any specific instructions, and send them to the service provider’s address. Be sure to choose a reliable shipping method with tracking to ensure the safe delivery of your memories.
Step 4: The Conversion Process
This is where the magic happens! Once your tapes reach the conversion service, they’ll go through a meticulous process to digitize your memories. Here’s what typically happens behind the scenes:
Cleaning and Inspection: The service will clean your VHS tapes and inspect them for any physical damage. Any necessary repairs will be made to ensure the best possible digitization.
Digitization: Using professional-grade equipment, your VHS tapes will be digitized with utmost care. The service will often use advanced technology to capture the highest quality video and audio possible.
Quality Control: After digitization, the service will perform quality control checks to ensure that your digital files meet their standards. This may involve color correction, audio enhancement, and other post-processing tasks.
File Formats: Most professional services offer a variety of file formats to choose from, including high-resolution options. You can usually request the format that best suits your needs.
Step 5: Receive Your Digital Files
Once the digitization process is complete, the service will provide you with the digital files. This is the moment you’ve been waiting for! Depending on the service, you may receive your files on a USB drive, DVD, or through a secure online link. Make sure to back up your digital files to prevent any accidental loss.
Step 6: Enjoy Your Newly Digitized Memories!
With your digital files in hand, you can now relive those cherished memories with ease. Whether you want to watch them on your computer, share them with family and friends, or even edit and create compilations, the possibilities are endless. You’ve not only preserved your past but also made it accessible for the future.
Additional Benefits of Professional Conversion Services
- Expertise: Professional services have the knowledge and experience to handle a wide range of VHS tape formats and conditions. They know how to get the best results, even from deteriorating tapes.
- Time-Saving: While DIY methods can be rewarding, they can also be time-consuming. Professional services allow you to focus on other aspects of your life while experts handle the conversion.
- Quality Assurance: With professionals, you can rest assured that every effort will be made to deliver the highest quality digitized content. This includes color correction, noise reduction, and audio enhancement.
- Preservation: Professional services often offer archival-grade digitization, ensuring that your memories are preserved in a format that can last for generations.
Opting for professional VHS-to-Digital Conversion Services can be a wise choice, especially if you want the best quality and minimal hassle. By entrusting your VHS tapes to experts, you’re not just converting them into a digital format; you’re preserving the essence of your memories, ensuring they stand the test of time. So, if your VHS tapes hold treasured moments you never want to lose, consider the professional touch to keep those memories alive and vibrant.
Method 3: Using a DVD Recorder
Remember those old DVD recorders that you might have used to burn copies of your favorite movies or TV shows back in the day? Well, they can do more than just copy discs. With the right setup, your trusty DVD recorder can serve as an efficient tool for converting your VHS tapes into a digital format that’s ready to be stored, shared, and enjoyed on modern devices.
The Setup
Here’s what you’ll need for this method:
- DVD Recorder: Ensure you have a DVD recorder that has video input and output ports. Most modern DVD recorders have composite (yellow, white, red) inputs, which are compatible with VCRs.
- VCR: Dust off your VCR from the attic or find one at a thrift store. Your VCR will be the bridge between the analog VHS tape and the digital DVD recorder.
- Blank DVD Discs: Make sure you have a supply of blank DVD-R or DVD-RW discs. These discs will serve as the digital canvas on which your VHS tapes will be transformed into digital files.
The Conversion Process
Now, let’s break down the conversion process step by step:
Step 1: Connect Your VCR to the DVD Recorder
Using composite cables (yellow for video, white and red for audio), connect the output ports of your VCR to the corresponding input ports on your DVD recorder. This physical connection allows the VCR to play the VHS tape while the DVD recorder captures the video and audio.
Step 2: Insert a Blank DVD Disc
Prepare a blank DVD-R or DVD-RW disc and insert it into the DVD recorder. Ensure you have enough space on the disc to accommodate the entire content of the VHS tape.
Step 3: Play the VHS Tape and Record
With your VCR and DVD recorder connected and the blank disc ready, it’s time to press play on your VCR and record on your DVD recorder. As the VHS tape plays, the DVD recorder will digitize the content in real-time onto the DVD disc. This process is similar to recording a TV program onto a DVD, but instead, you’re recording the VHS content.
Step 4: Finalize the DVD
Once the recording is complete, you’ll need to finalize the DVD. Finalization is crucial because it allows the DVD to be readable on other devices, such as computers. Without finalization, your digital files may remain locked on the DVD recorder.
Step 5: Transfer the Digital Files
After finalizing the DVD, remove it from the recorder and insert it into your computer’s DVD drive. You can now access the digital files stored on the disc. Simply copy the files to your computer’s hard drive or an external storage device for safekeeping.
Step 6: Enjoy Your Digitized Memories
With your VHS tape successfully converted to a digital format, you can now relive those cherished memories on your computer, share them with family and friends, or even edit and enhance the content to your heart’s desire.
When selecting blank DVD discs, opt for high-quality DVD-Rs for better preservation of your memories. Lower-quality discs may deteriorate over time and affect the longevity of your digital files.
This method is particularly appealing if you’re looking for a simple and cost-effective way to convert your VHS tapes to digital format. Many households already have a DVD recorder on hand, and the process is relatively straightforward. However, keep in mind that the digital quality you achieve will depend on the capabilities of your specific DVD recorder.
So, if you’re ready to embark on a journey to preserve your precious memories, dust off that VCR, grab a stack of blank DVD discs, and let your DVD recorder do the magic of turning analog nostalgia into digital treasures.
Method 4: Capture with a Camcorder
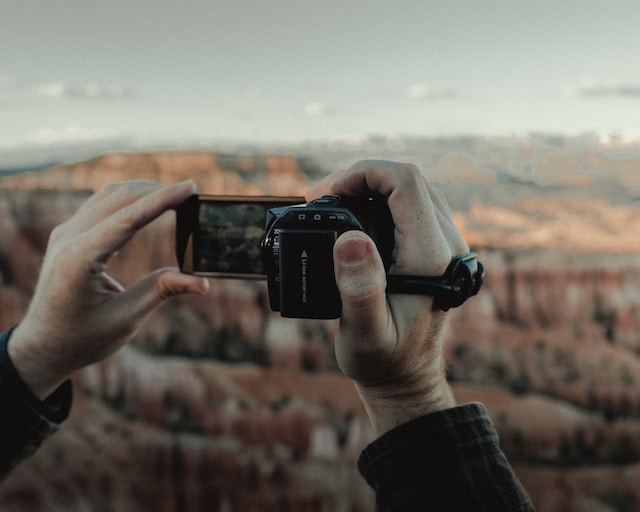
In a world filled with high-tech solutions, it might seem surprising that a digital camcorder can be a valuable tool for VHS-to-digital conversion. However, this method offers an accessible and budget-friendly way to breathe new life into your old tapes. Here’s a more detailed breakdown of the process:
Step 1: Connect Your VCR and Camcorder
Begin by connecting your VCR to your digital camcorder using composite cables. These cables typically come in yellow, white, and red connectors. Plug one end into the video and audio output of your VCR and the other end into the corresponding inputs on your camcorder. This setup essentially turns your camcorder into a bridge between the analog VHS tape and the digital realm.
Step 2: Prepare for Recording
Ensure both your VCR and camcorder are powered on and ready to go. You’ll need to put your camcorder in record mode, and it’s a good idea to set it up on a stable surface or tripod for steady recording. Make sure your camcorder has enough battery life or is connected to a power source for the duration of the recording.
Step 3: Record Your VHS Tape
With everything set up, press play on your VCR to start playing the VHS tape. Simultaneously, press the record button on your camcorder to start capturing the video and audio from the VHS tape. This process essentially involves your camcorder acting as a digital recorder for the analog content coming from the VCR.
Step 4: Transfer to Your Computer
Once you’ve recorded the entire VHS tape, it’s time to transfer the video from your camcorder to your computer. To do this, connect your camcorder to your computer using a USB cable. Most digital camcorders come with software for transferring and editing footage. Follow the instructions provided by your camcorder’s manufacturer to import the captured video onto your computer.
Step 5: Edit and Save the Digital Files
After transferring the video to your computer, you can use video editing software to trim, enhance, and organize your digitized footage. Many camcorders come with basic editing software, but you can also use more advanced video editing tools for greater control over the final result. Once you’re satisfied with your edits, save the digital files on your computer or an external storage device.
This method allows you to take advantage of your existing digital camcorder, making it a cost-effective option for converting VHS tapes to digital. It’s an especially great choice if you already own a camcorder with video capture capabilities.
While capturing VHS tapes with a camcorder might require some extra steps compared to other methods, it’s a viable option that allows you to breathe new life into your old memories. Plus, you get the satisfaction of being hands-on in the conversion process, making it a rewarding DIY project for those who enjoy a bit of technical adventure.
So, if you’re ready to embark on a journey down memory lane, dust off your camcorder, and start preserving those cherished moments with this innovative VHS-to-digital conversion method.
Method 5: Using a DVD/VHS Combo Player
Are you one of those people who happen to own a DVD/VHS combo player? You might have purchased it years ago, thinking it was the pinnacle of home entertainment technology. Well, it’s time to dust it off and put it to good use. These versatile machines not only let you watch your favorite old DVDs and VHS tapes but also serve as an excellent tool for digitizing those cherished VHS memories.
The Simplicity of Conversion
One of the most appealing aspects of using a DVD/VHS combo player for VHS-to-digital conversion is its simplicity. If you’ve been hesitant to tackle the world of digitization because you’re not a tech wizard, this method might be your saving grace.
Step 1: Connecting the Hardware
To begin, you’ll need to connect your VCR to the DVD/VHS combo player. This typically involves using composite cables, which are color-coded as yellow (video), white (left audio), and red (right audio). These cables ensure that both the video and audio signals from your VCR are transmitted to the combo player.
Step 2: Inserting a Blank DVD
Next, you’ll want to insert a blank DVD-R or DVD-RW disc into the combo player. These discs are readily available at most electronics stores and online retailers. The type of disc you choose depends on your preferences; DVD-R is write-once, while DVD-RW allows for rewriting multiple times.
Step 3: Recording the VHS Tape
Once your hardware is connected and your blank disc is loaded, it’s time to play the VHS tape you want to digitize. Most DVD/VHS combo players come equipped with a recording feature specifically designed for this purpose. Simply press the record button on the combo player, and it will start recording the VHS tape onto the DVD.
Step 4: Finalizing the DVD
After recording the content from the VHS tape onto the DVD, you’ll need to finalize the disc. Finalizing essentially closes the disc to further recording and prepares it for playback on other devices, such as your computer. The process for finalization may vary depending on your combo player’s make and model, so be sure to consult the user manual for specific instructions.
Step 5: Transferring the Digital Files
With the finalized DVD in hand, you can now transfer the digital files to your computer. This is typically done using your computer’s DVD drive. Once transferred, you’ll have a digital copy of your VHS tape that you can edit, share, and store as you see fit.
A Cost-Effective Solution
Using a DVD/VHS combo player for VHS-to-digital conversion is not only straightforward but also cost-effective. Since many people already own these combo players, there’s no need to invest in additional hardware or software. This makes it an accessible option for those who want to digitize their memories without breaking the bank.
Important Considerations
While this method offers simplicity and affordability, there are a few important considerations to keep in mind:
- Recording Quality: The quality of the digital copy depends on several factors, including the quality of your VHS tape and the capabilities of your combo player. While it may not rival professional digitization services, it can still provide satisfactory results.
- Compatibility: Ensure that your finalized DVD is in a format that’s compatible with your computer. Most combo players use DVD-R format, which is widely supported.
- Storage: Remember that digital files take up space on your computer or external storage device. Be prepared to allocate sufficient storage for your digitized VHS content.
If you’ve been sitting on a DVD/VHS combo player, it’s time to make it work for you. This method offers a straightforward and cost-effective way to digitize your VHS tapes, allowing you to relive those cherished memories in the digital age. It’s a testament to how versatile and enduring these combo players can be in preserving your personal history.
Method 6: Using a Capture Card
A capture card, also known as a video capture card or capture device, is a hardware component that allows you to capture video and audio signals from external sources, such as VHS players, gaming consoles, or camcorders, and transfer them to your computer for processing and storage. Capture cards are commonly used by gamers to record and stream gameplay, but they are equally useful for digitizing analog video sources like VHS tapes.
How to Use a Capture Card for VHS-to-Digital Conversion:
- Acquire a Capture Card: Start by purchasing a capture card that suits your needs and budget. These cards come in various models and price ranges, so it’s essential to choose one that offers the right features for VHS digitization.
- Connect Your VCR: Using composite (yellow, white, red) cables or S-video cables, connect your VCR’s output to the input of the capture card. Ensure a secure connection for optimal results.
- Install Capture Card Software: After connecting the hardware, install the capture card’s software on your computer. Most capture cards come with proprietary software that allows you to control the capture process.
- Configure Settings: Launch the software and configure the settings according to your preferences. You can typically adjust parameters like video quality, resolution, and audio settings. For VHS digitization, it’s advisable to choose the highest possible quality settings.
- Play and Capture: Play your VHS tape on the VCR and use the capture card software to start recording. The capture card will convert the analog signal into a digital format in real-time. You can monitor the capture process on your computer screen.
- Edit and Save: Once you’ve captured the entire VHS tape, you can use the software to edit the footage, remove any unwanted sections, and enhance the quality if necessary. After editing, save the digitized video to your computer.
- Transfer and Backup: To ensure the safety of your digital files, transfer them to an external hard drive or cloud storage. This step is crucial in case your computer experiences data loss or hardware failure.
- Enjoy Your Digital Memories: With your VHS tapes successfully converted to digital format, you can now enjoy your cherished memories with ease. Share them with friends and family, create digital archives, or even edit and enhance the content to bring it back to life.
Advantages of Using a Capture Card:
- High-Quality Output: Capture cards are known for their ability to capture video in high resolution, ensuring that your digitized VHS tapes maintain as much quality as possible.
- Real-Time Conversion: Capture cards offer real-time conversion, meaning you can capture VHS footage as you play it, eliminating the need for lengthy waiting times.
- Advanced Editing: Capture card software often includes advanced editing features, allowing you to fine-tune your digitized videos for optimal results.
- Compatibility: Capture cards are compatible with a wide range of video sources, making them versatile tools for various digitization projects.
- Customization: You have control over the settings and parameters, allowing you to tailor the digitization process to your specific preferences.
While capture cards may require a more significant initial investment compared to some other methods, their versatility and ability to deliver high-quality results make them an excellent choice for those who want to preserve their VHS memories with the utmost precision.
Conclusion: Preserve Your Memories, One Tape at a Time
Converting your VHS tapes to digital format is not only a practical choice but also a way to ensure that the moments you hold dear stay with you forever. Whether you choose the DIY route or opt for professional services, the methods we’ve discussed here offer a range of options to suit your needs, budget, and technical expertise. So dust off those old VHS tapes, embark on a journey down memory lane, and give your cherished moments the digital makeover they deserve!
FAQ
What is the best format to digitize VHS tapes?
The best format for digitizing VHS tapes is typically MPEG-2 or AVI for video and WAV or MP3 for audio. These formats offer a good balance between quality and file size. However, the ideal format may vary depending on your specific needs and the equipment you plan to use for playback.
Can I digitize VHS tapes without losing quality?
While it’s challenging to achieve a digital copy that surpasses the original VHS quality, you can minimize quality loss by using high-quality equipment and selecting the right settings during the conversion process. Professional conversion services often employ advanced equipment and techniques to preserve as much quality as possible.

Steven Adams, a former bank assistant, is now the founder of a tech news website. With a passion for staying up-to-date with modern advancements, Steven delivers insightful and accessible content to keep readers informed about the evolving world of technology.
Join him on his journey to uncover the latest tech news and explore groundbreaking innovations.