
Hey there, fellow digital adventurer! So, you’ve got this snazzy MP4 video that’s almost perfect, but you want to sprinkle some magic on it to make it truly shine. Well, you’re in luck because we’re about to embark on an epic journey into the realm of video editing. It’s time to turn your raw footage into a masterpiece!
The magical world of video editing
Before we dive headfirst into the world of editing, let’s take a moment to appreciate the art of it. Video editing is like crafting a beautiful mosaic – it’s about arranging individual pieces to create a stunning whole. With MP4 videos, you’re not just telling a story; you’re painting a cinematic canvas. Now, let’s get our hands dirty!
The Quest for the Right Software
In our quest to become video editing wizards, the first step is choosing the right magic wand, I mean, software. There’s a whole enchanted forest of options out there, so let’s pick the one that suits our needs and budget.
What to Look For:
- User-friendly interface: You don’t want to spend more time deciphering menus than editing your video.
- Features galore: Look for software that offers a range of editing tools, from basic to advanced.
- Compatibility: Ensure your chosen software supports the MP4 format.
- Budget-friendly: You don’t need to break the bank to edit like a pro.
Examples of Great Editing Software:
- Adobe Premiere Pro: A great video editor, but it comes with a price tag.
- DaVinci Resolve: A powerful free option with professional-level features.
- HitFilm Express: A user-friendly choice for beginners.
Importing Your Video – Easy as Pie
Once you’ve picked your trusty software, it’s time to bring your video into the editing realm. Think of this as summoning your video’s spirit into your software’s enchanted circle.
How to Do It:
- Open your chosen software.
- Create a new project and give it a fantastical name.
- Find the Import or Add Media button
- Locate your MP4 video on your computer and select it.
- Click Import and watch the magic happen!
Unleash Your Editing Powers
Now, let’s talk about the basics of editing. This is where the real fun begins. You’re like a sculptor, chiseling away the excess to reveal your masterpiece.
Basic editing spells:
- Trimming: Cut out the boring bits or those sneezes that interrupted your perfect shot.
- Splitting: Divide your video into manageable chunks for easier manipulation.
- Arranging: Rearrange the clips like pieces of a puzzle to tell your story.
Pro Tip: Keyboard shortcuts are your magical spells – they make your editing faster than a wizard. Remember “S” for splitting and “Delete” for removing unwanted bits.
Adding Spice with Effects and Transitions
Want to sprinkle some stardust on your video? This is where you get to add effects and transitions to make your viewers’ jaws drop.
Fun Fact: The infamous “star wipe” transition from the early days of video editing is now a comedic relic.
- Transitions: Smoothly transition between scenes with style. Try out fades, wipes, or zooms.
- Filters: Give your video a unique look by applying filters like Noir, Vintage, or Sci-Fi.
- Text and Captions: Add witty comments or informative captions to guide your audience.
The Symphony of Sound
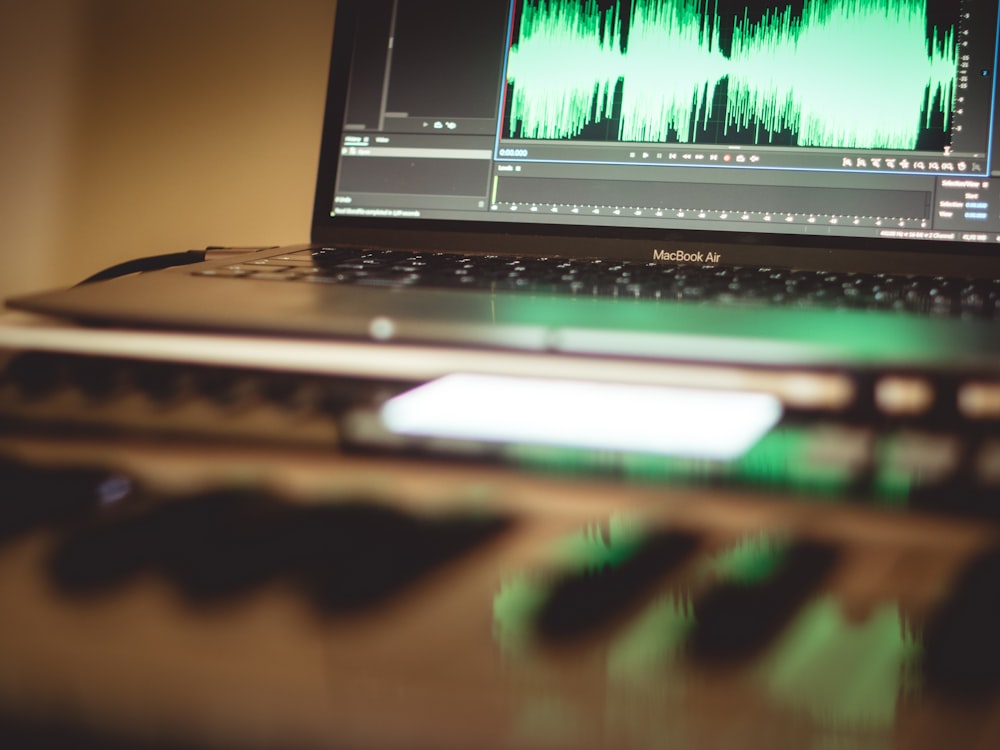
A video isn’t just about what you see; it’s also about what you hear. Even Mozart would be jealous of your audio finesse.
How to Elevate Your Soundtrack:
- Volume Control: Adjust the audio levels to ensure no one goes deaf or misses a word.
- Background Music: Add some rhythm to your video with carefully selected tunes.
- Noise Reduction: Banish unwanted background noises to the dark corners of oblivion.
Exporting Your Masterpiece
With your video now a work of art, it’s time to share it with the world. But first, you need to export it in the right format.
Export Settings to Consider:
- Resolution: Choose the best quality your audience can handle.
- Format: MP4 is your trusty steed for sharing on the web.
- Compression: Balance file size and quality with compression settings.
Dodging Common Pitfalls
As you embark on your epic video editing quest, it’s crucial to be aware of the lurking challenges and pitfalls that can threaten to derail your creative journey. These are the dragons and quicksand patches you’ll need to navigate with care. Let’s dive deep into these challenges and learn how to emerge victorious:
1. Pixelation
The Pitfall: You’ve just spent hours perfecting your video, but when you export it, you notice pixelation – those nasty, blocky artifacts that ruin your hard work.
How to Dodge It: To avoid pixelation, ensure you’re exporting your video in the right resolution and bitrate. Match the export settings to your source footage. For instance, if your footage is in 1080p, export in 1080p as well. Additionally, choose the right codec (like H.264) for optimal quality.
Pro Tip: When working with multiple clips or assets of different resolutions, consider using a sequence that matches the highest resolution in your project to maintain quality.
2. Audio Desync
The Pitfall: You’ve painstakingly synchronized your audio with your video, but as you watch your exported masterpiece, you notice that the audio and video are out of sync.
How to Dodge It: Audio desync can occur due to various reasons, but the most common is a mismatch between the frame rate of your video and your audio. Double-check that your project settings match the frame rate of your source media. If your audio is still out of sync, you might need to manually adjust it by shifting the audio track in your editing software.
Pro Tip: Some advanced video editing software offers automatic audio syncing tools that can save you loads of time.
3. File Format Conflicts
The Pitfall: You’ve completed your magnum opus, and it looks stunning in your editing software, but when you try to export it, you’re met with error messages about incompatible formats.
How to Dodge It: To avoid file format conflicts, ensure that your project settings in your editing software match the format you intend to export. If you’re exporting for a specific platform (like YouTube or Vimeo), check their recommended settings and use those.
Pro Tip: Before you start your project, take a moment to research the best export settings for your intended platform. It’ll save you time and frustration later.
4. Lossy Compression
The Pitfall: You’ve crafted a visual masterpiece, but when you export it with aggressive compression settings to reduce file size, your video loses its sharpness and detail.
How to Dodge It: Compression is a necessary evil to reduce file sizes, but you can minimize the damage. Choose a moderate compression setting that balances file size and quality. H.264 is a versatile codec that strikes a good balance. Additionally, export your video in as high a bitrate as possible while staying within your storage constraints.
Pro Tip: If storage isn’t an issue, consider exporting in a high-quality codec like ProRes or DNxHD to preserve maximum detail.
5. Export Errors
The Pitfall: You’ve reached the finish line, but when you hit the export button, you encounter cryptic error messages that leave you scratching your head.
How to Dodge It: Export errors can be caused by various factors, such as missing media files, incompatible settings, or insufficient system resources. Before exporting, double-check that all your media files are in the right place and that your project settings are consistent. If you’re still encountering issues, try exporting a smaller portion of your project to isolate the problem.
Pro Tip: Keep an eye on your computer’s resource usage during export. If you’re running out of RAM or processing power, it can lead to export errors. Close unnecessary applications to free up resources.
Chapter 8: Tips for Efficient Editing

Editing is an art that thrives on efficiency. To truly master this craft, let’s delve deeper into the realm of tips and tricks that will make your video editing process smoother than a silk ribbon blowing in the wind:
- Keyboard Shortcuts: We mentioned them earlier, but let’s emphasize how vital they are. Learn those shortcuts like your life depends on it. They’re your secret passcodes to the editing kingdom.
- Render Preview: Don’t waste time rendering your entire project for a preview. Most software lets you render a section to see how it looks – use this to your advantage.
- Proxy Files: Working with high-resolution footage can be a drag on your computer’s performance. Create proxy files with lower resolutions for smoother editing, then switch to high-res for the final export.
- Save Versions: Don’t overwrite your project every time you save. Instead, save versions or iterations of your work. This way, you can always backtrack if needed.
- Multi-Monitor Setup: If you have the luxury, use multiple monitors. It’s like having a big canvas to paint on; you can see the bigger picture while working on details.
- Color Labels: Use color labels to organize your clips and sequences. Red for action scenes, green for dialogue, and blue for scenic shots – it’s like a rainbow of organization.
Conclusion
And so, dear video editing enthusiast, your creative odyssey continues. You’ve ventured through the labyrinthine software, wielded your keyboard shortcuts like a true sorcerer, and emerged with a video that tells a story, evokes emotions, and captures moments in time. Remember, the world of video editing is a boundless landscape. Every project is a fresh adventure, every edit a chance to push your limits, and every viewer an opportunity to share your vision.
Frequently asked questions
1. Can I edit an MP4 video on my smartphone?
Absolutely! You can edit MP4 videos on your smartphone, and there are several user-friendly mobile apps available for both Android and iOS devices that make it a breeze. Here are a couple of popular options:
- Adobe Premiere Rush: This mobile-friendly version of the industry-standard Adobe Premiere Pro offers a range of editing tools, including trimming, cutting, transitions, and color grading. It’s great for those who want to maintain a professional touch while on the go.
- iMovie: If you’re an Apple user, iMovie is a fantastic choice. It’s intuitive, user-friendly, and comes pre-installed on most iOS devices. You can easily cut and arrange clips, add music, and even create Hollywood-style trailers.
2. What’s the best format for YouTube uploads?
When it comes to sharing your edited videos on YouTube, it’s essential to choose the right format to ensure both quality and compatibility. The recommended format for YouTube uploads is MP4 with H.264 codec. This combination offers a fantastic balance between video quality and file size. It’s widely supported by YouTube and ensures your viewers get the best experience without excessively large files.
3. How do I silence background noise in my video’s audio?
Dealing with pesky background noise can be a real challenge, but fear not, there are tools and techniques to help you tackle it:
- Noise Reduction Tools: Most video editing software includes noise reduction features. To use them, simply select the audio clip with the unwanted noise, find the noise reduction tool, and follow the prompts to reduce or eliminate background noise.
- Audio Editing Software: If your video editing software’s noise reduction tools aren’t doing the trick, you can export the audio and use dedicated audio editing software like Audacity. It offers advanced noise reduction capabilities and allows for fine-tuning.
4. Can I edit a video I found on the internet?
Editing someone else’s video without permission can lead to legal issues related to copyright infringement. It’s always best to stick to content that you own or have the necessary rights to use. If you do have permission or the proper licenses, make sure to credit the original creators appropriately.
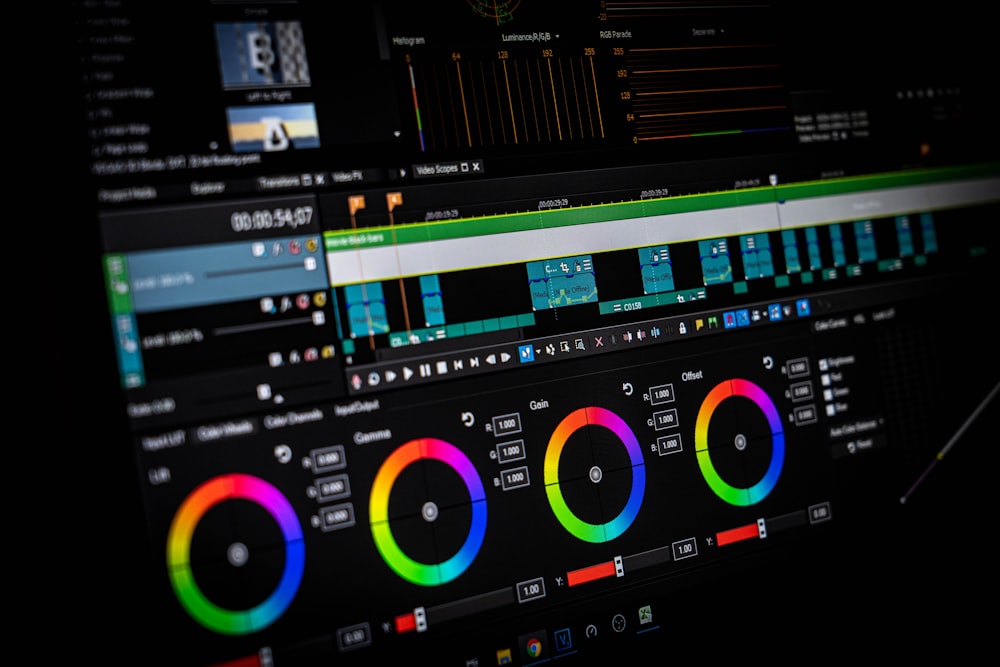
5. What’s the difference between editing and color grading?
While both are essential aspects of video post-production, editing and color grading serve different purposes:
- Video Editing: This involves arranging and manipulating video clips to create a coherent narrative. It includes tasks like cutting, trimming, adding transitions, special effects, and text overlays. Editing shapes the structure and flow of your video.
- Color Grading: Color grading focuses on adjusting the colors and tones in your video to achieve a specific look or mood. It involves tweaking brightness, contrast, saturation, and color balance. Color grading can dramatically impact the visual style and emotional impact of your video.
In summary, editing shapes the story, while color grading shapes the visual aesthetics of your video. These FAQs should help you navigate the world of video editing more smoothly. Remember, practice and experimentation are your best allies on your journey to becoming a video editing master! Now that you’re armed with these answers, go forth and edit like the video wizard you were born to be!

Steven Adams, a former bank assistant, is now the founder of a tech news website. With a passion for staying up-to-date with modern advancements, Steven delivers insightful and accessible content to keep readers informed about the evolving world of technology.
Join him on his journey to uncover the latest tech news and explore groundbreaking innovations.